【LAB】“Off Contact” is the key to successful screen printing
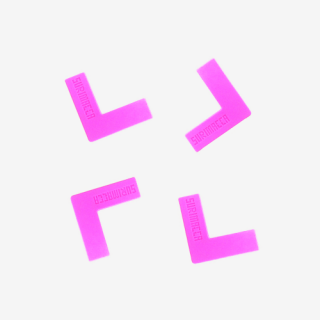
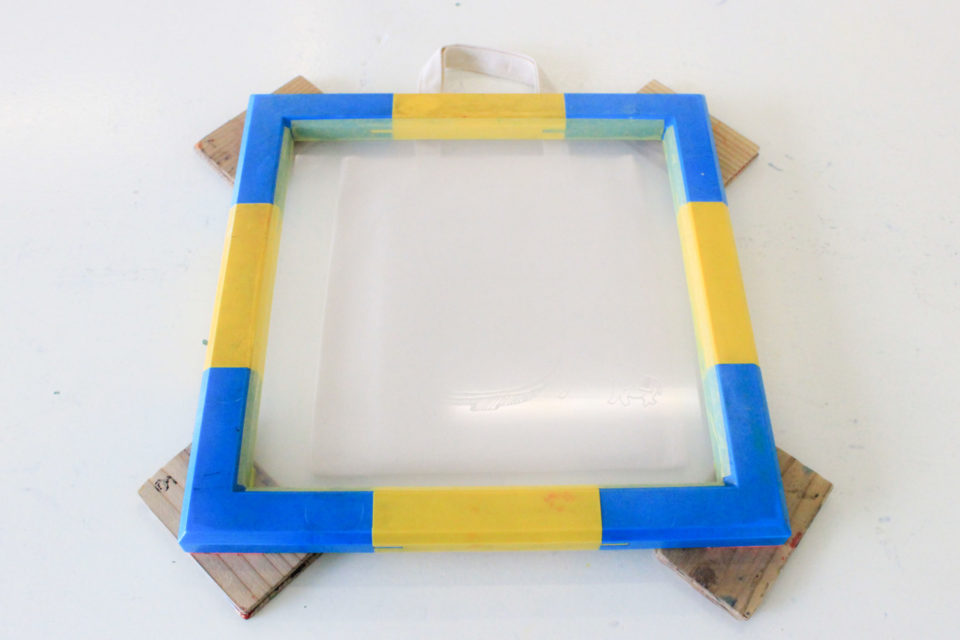
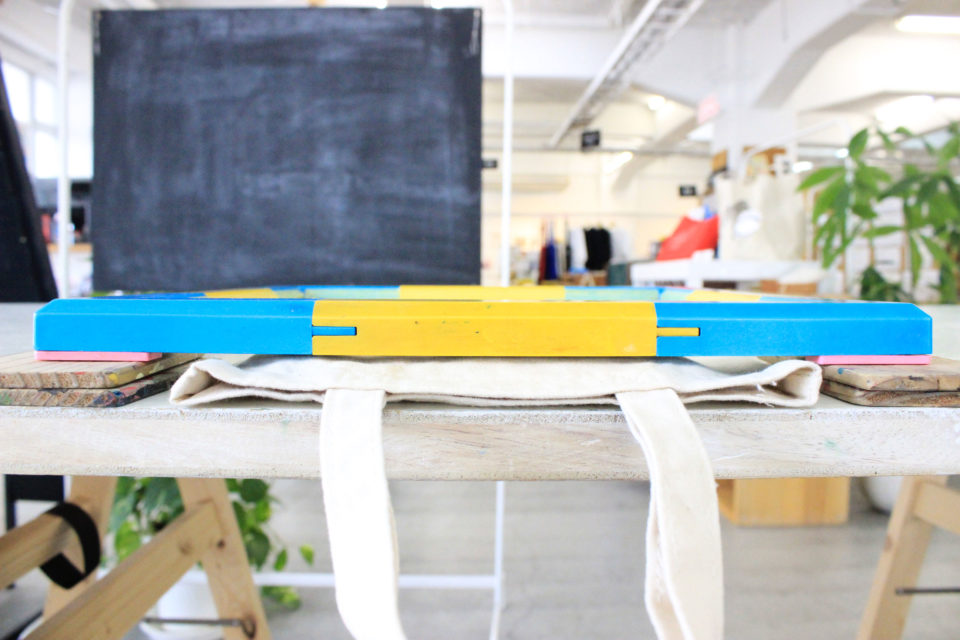
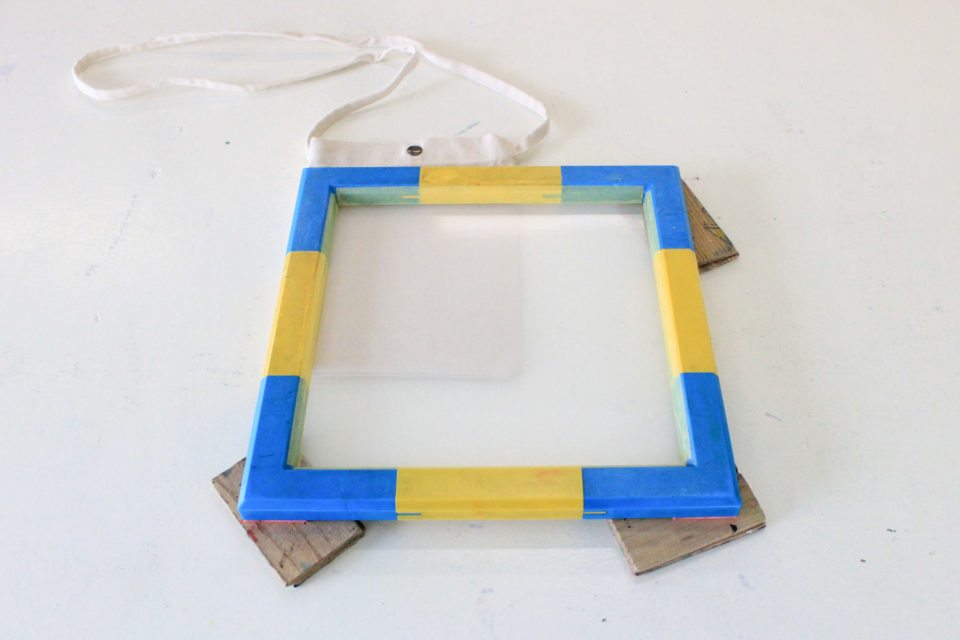
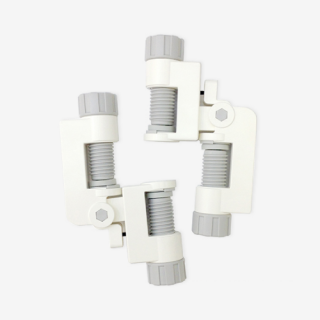
SURIMACCA comes with pink parts called “Spacer.”
As its name implies, they are parts that create some space (a.k.a. Off-Contact) between a screen and material being printed. They can be attached to the backside of corner parts and give about 3mm(1/8 inch) of a gap. Very useful!
The screen is supposed to be touching the material only when it’s being pushed down by a squeegee, but floats over the material otherwise. This is a very important point for successful screen printing.
However, attaching Spacers to SURIMACCA frames does not solve all the problems with printing …
In this blog, I will be introducing a variety of ways to create off-contact.
With only Spacers
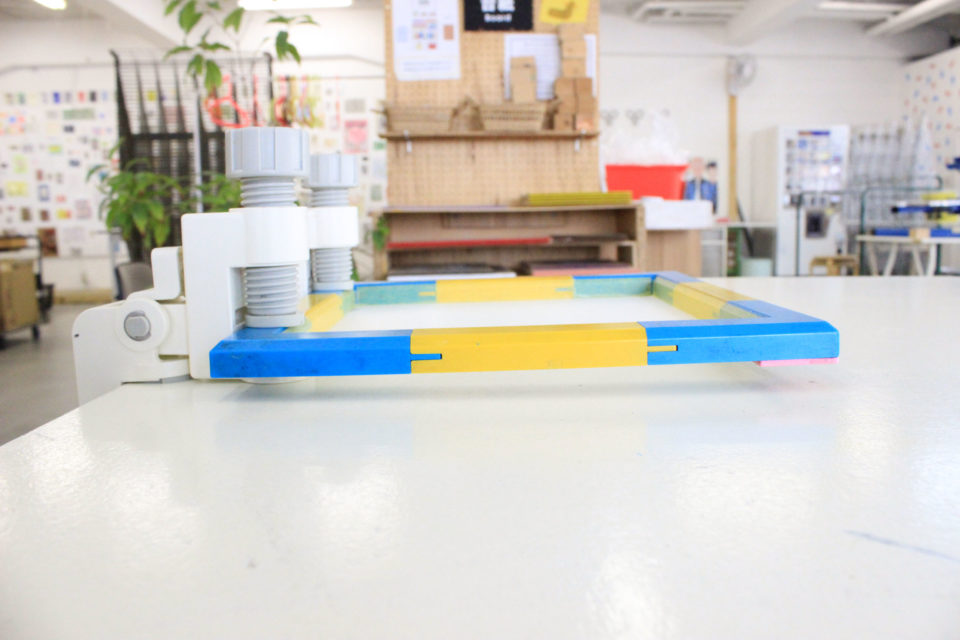
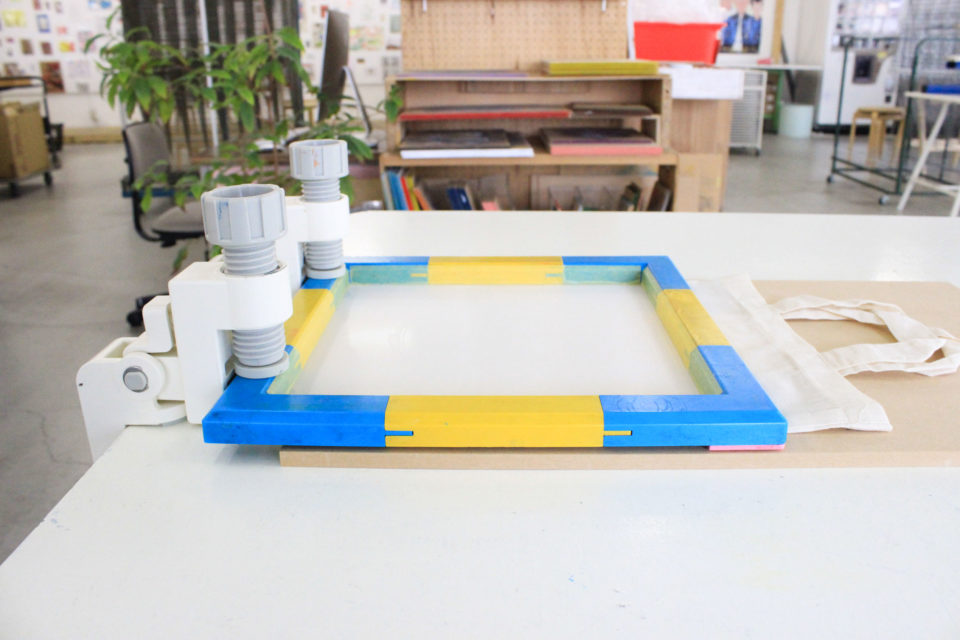
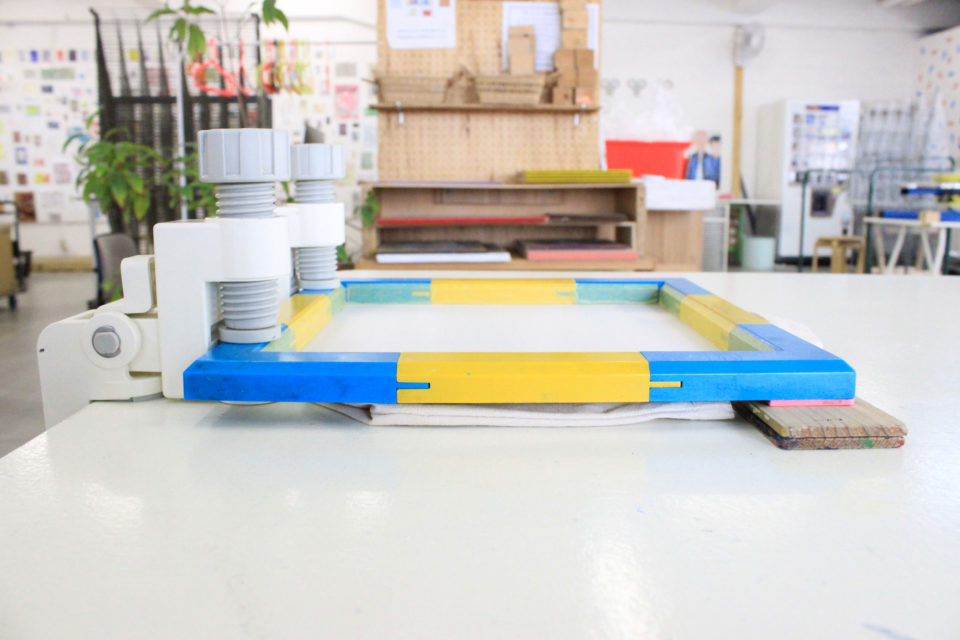
Easiest material to print on with only Spacers are ones that are “flat, and bigger than your screen.”
More specifically, it is the best to have all four corners of SURIMACCA with Spacers placed on a flat table or a board that you slide into the inside of the material (such as bags and T-shirts) when printing, to create off-contact.
Spacers with cardstock paper or/and board
There are some materials that are hard to have proper off-contact with only Spacers:
・materials that are smaller than SURIMACCA frame
・materials that some of the four corners goes outside of the material when printing
・materials with adjusted surface level because of stitches, bottoms, zippers, or pockets.
For those materials, you need to add boards underneath Spacers to give more height to them.
Depending on the thickness of the material, you might need to add a little thicker board but take Spacers off to create the proper height.
If you get lazy on this step of the preparation, you might get bled images because the screen is too far from the material, or you might get smudged images because the screen is too close to (or touching) the material. (It all depends on each set up.)
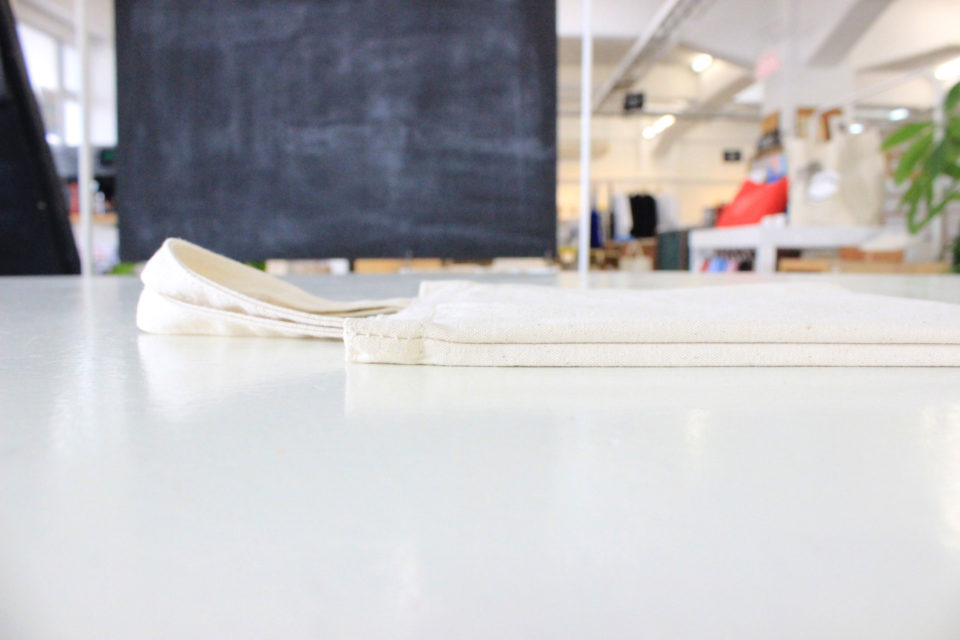
Materials that are smaller than the SURIMACCA frame
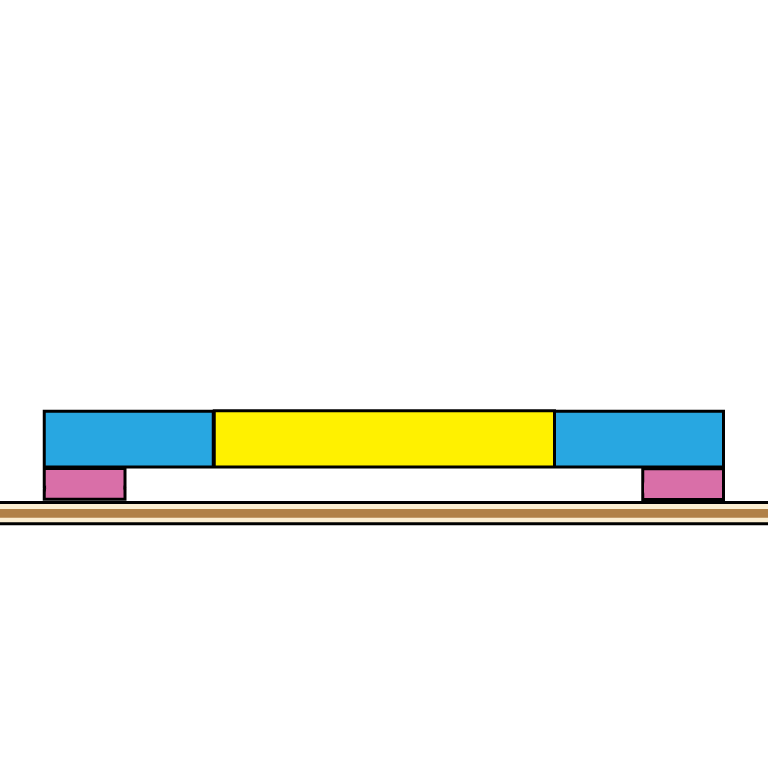
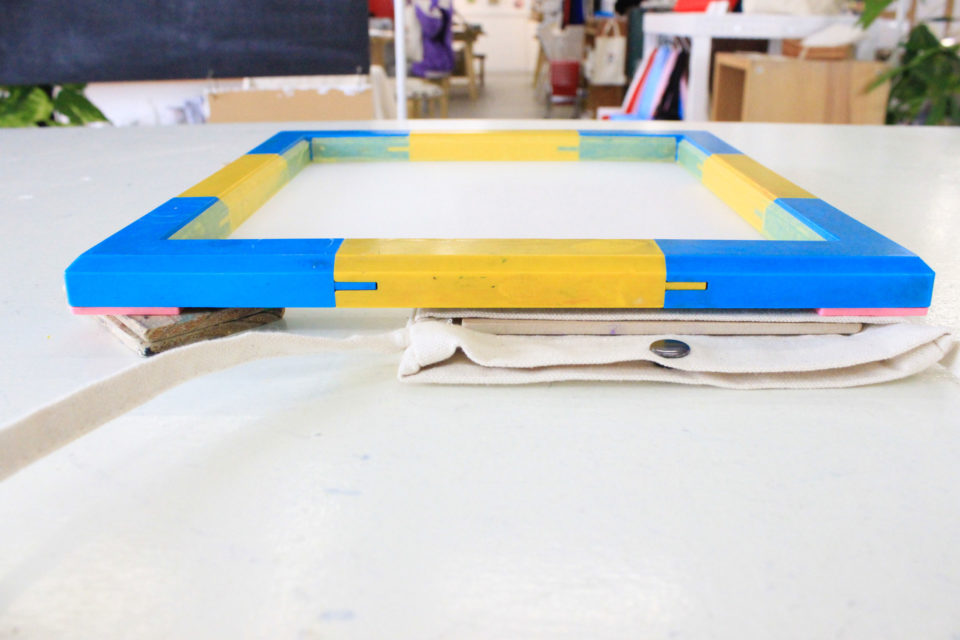
This is SURIMACCA frame with Spacers, placed onto a small material.
As you can see, corners with Spacers are floating and the screen is touching the material.
You can use cardstock paper or board to give about the same height as the material to them, then …
Now you have good off-contact between the SURIMACCA and the material.
You can start printing at ease now.
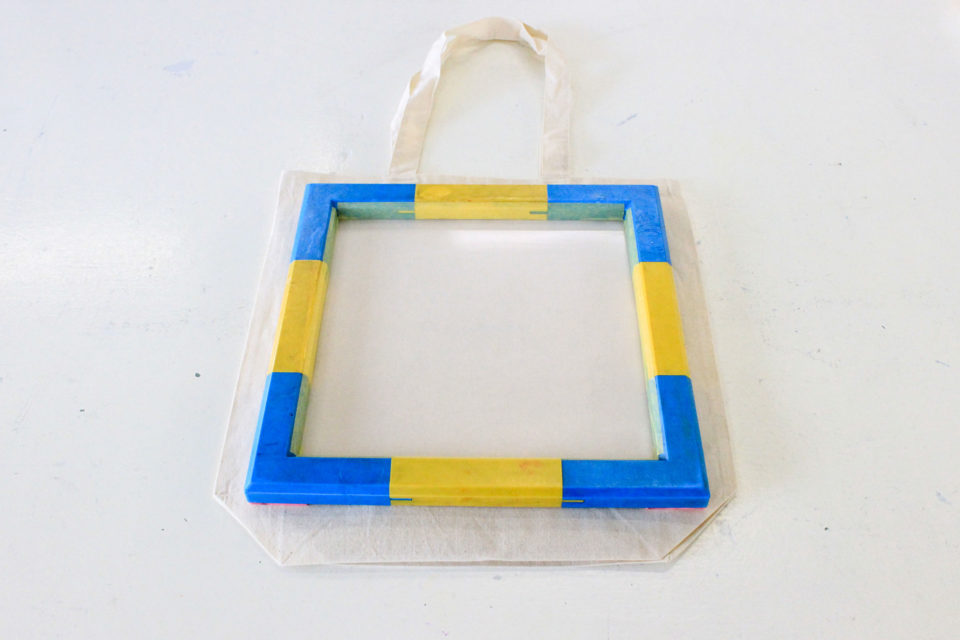
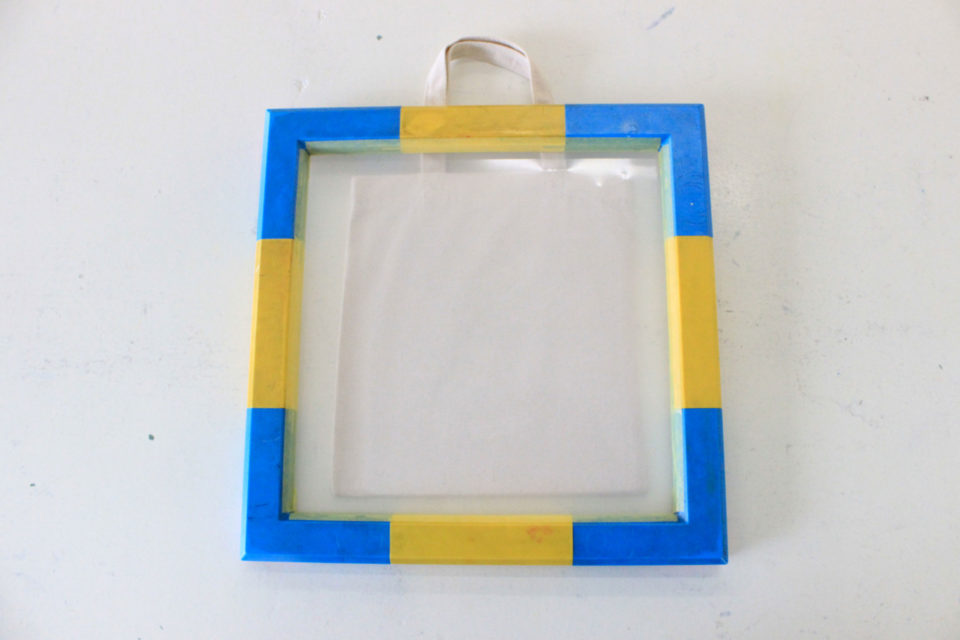
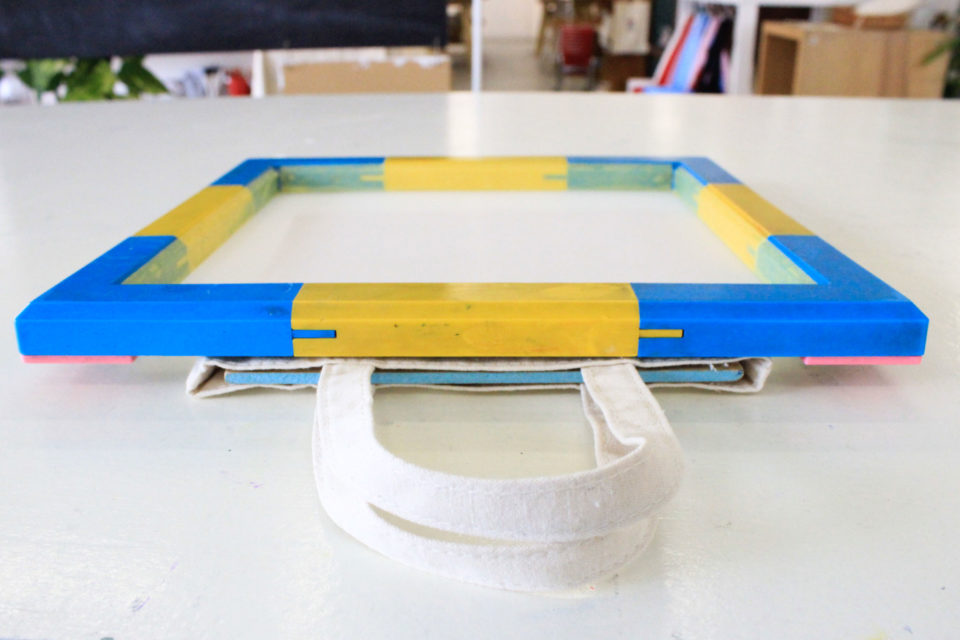
Material with handles, gusset, stitches, bottom, and zippers
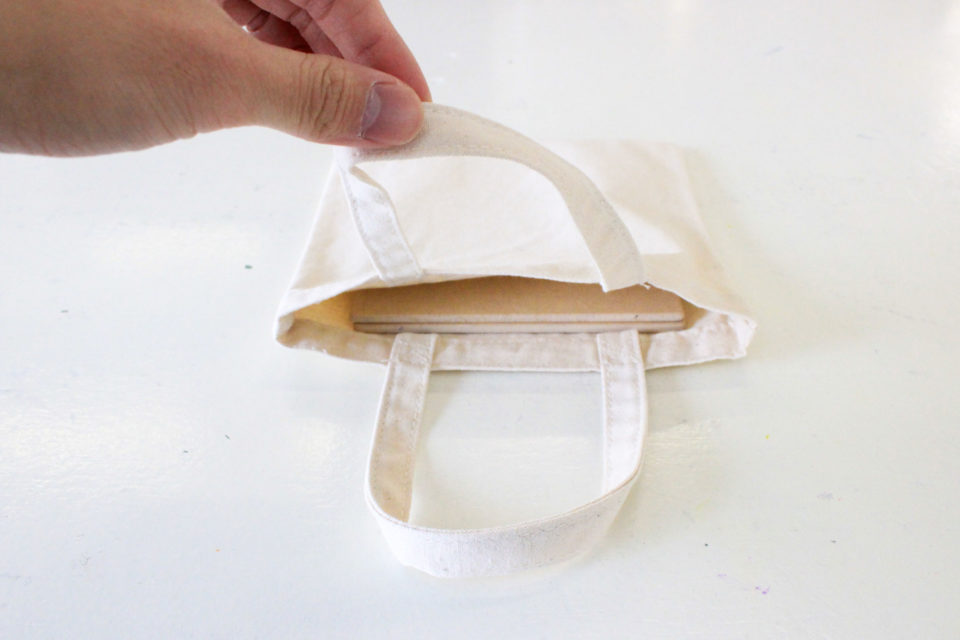
For these materials with handles, stitches, bottoms, and zippers that create difference in level on the surface that you want to print on, use more boards to align the level, as much as you can.
Bags with gussets also need to be taken care of differently when printing.
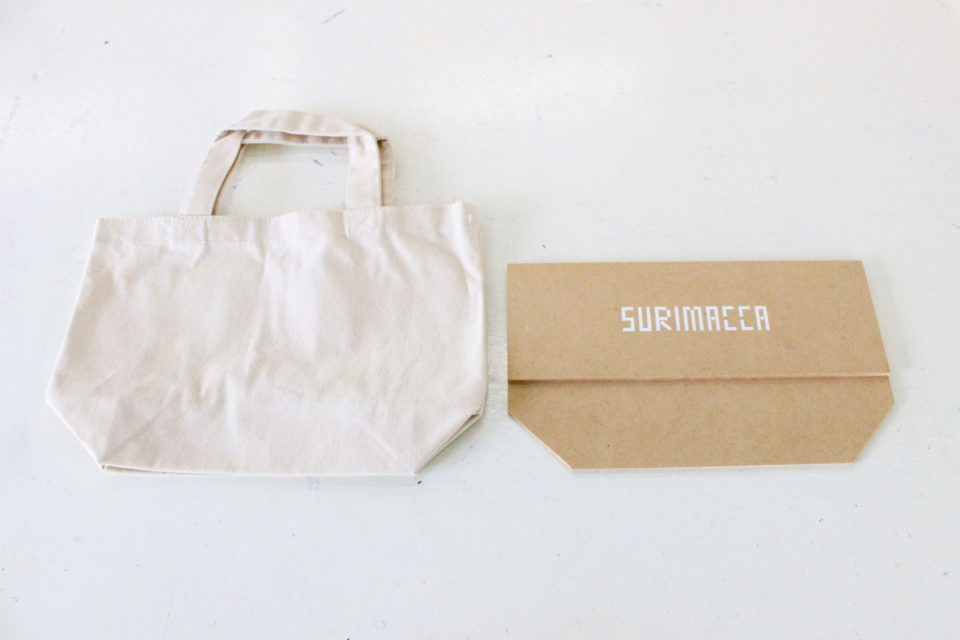
As one of your choices, we have this product called “lunch bag panel” for the lunch bags we sell at JAM stores and online store, that makes your printing easier. (*Only domestic shipping is available at the moment.)
This product is made by combining two different sized boards, and when placed in the lunch bag, the gusset can be flattened, so you can print on it easily.
Some of the corner on the outside of the material
Use cardstock paper or boards also, when some of the corners are off from the material.
You might have to use one board sliding into the material and use two boards underneath the Spacers to make the surface flat and keep the distance right at the same time. Be flexible and adjust the height depending on the material you are printing on.
Material with an area being raised up (e.g. T-shirt with a pocket)
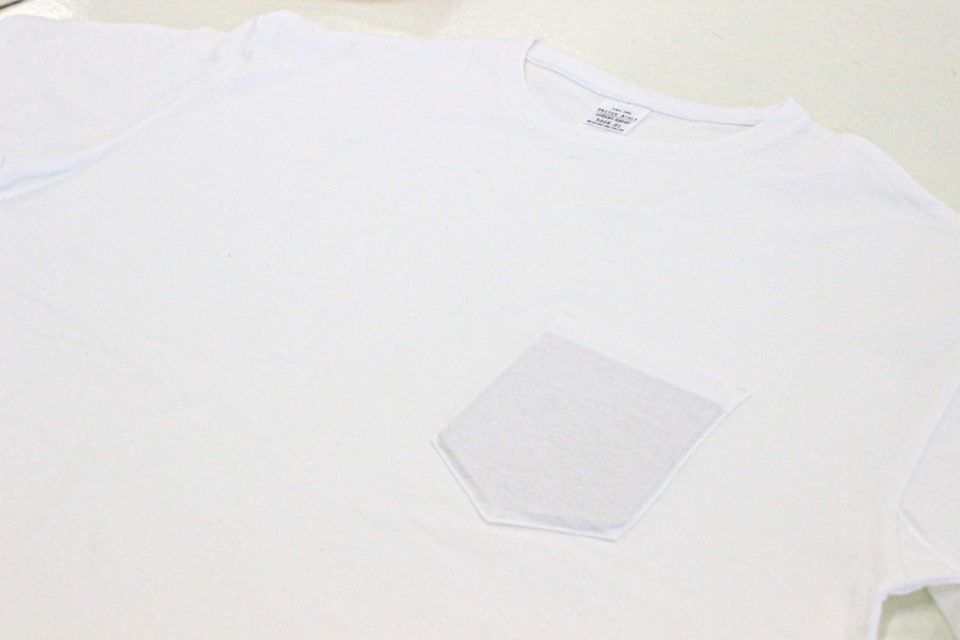
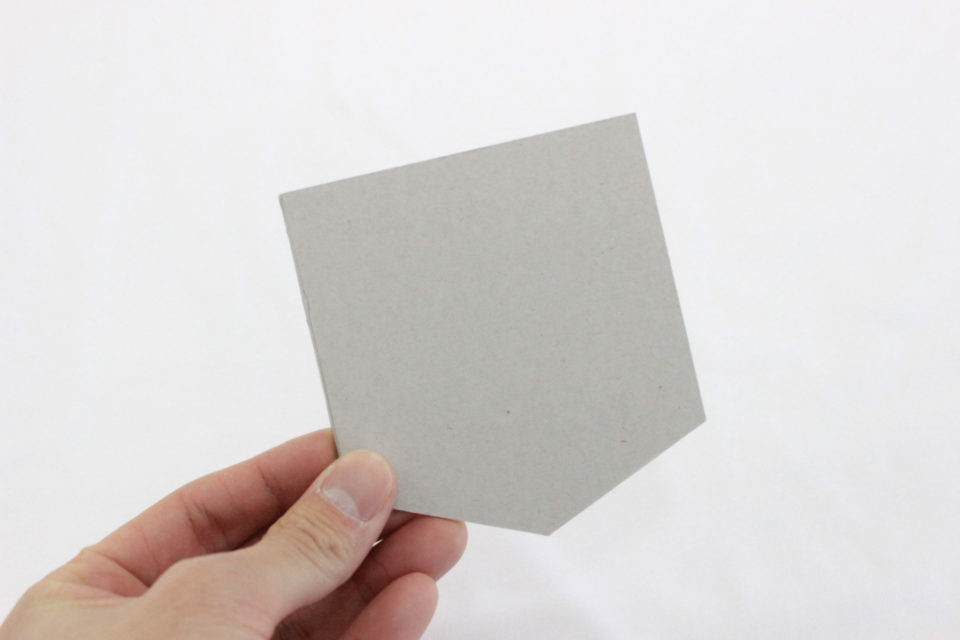
For a T-shirt with a pocket, you can cut out the shape of the pocket from a chipboard and put it inside.
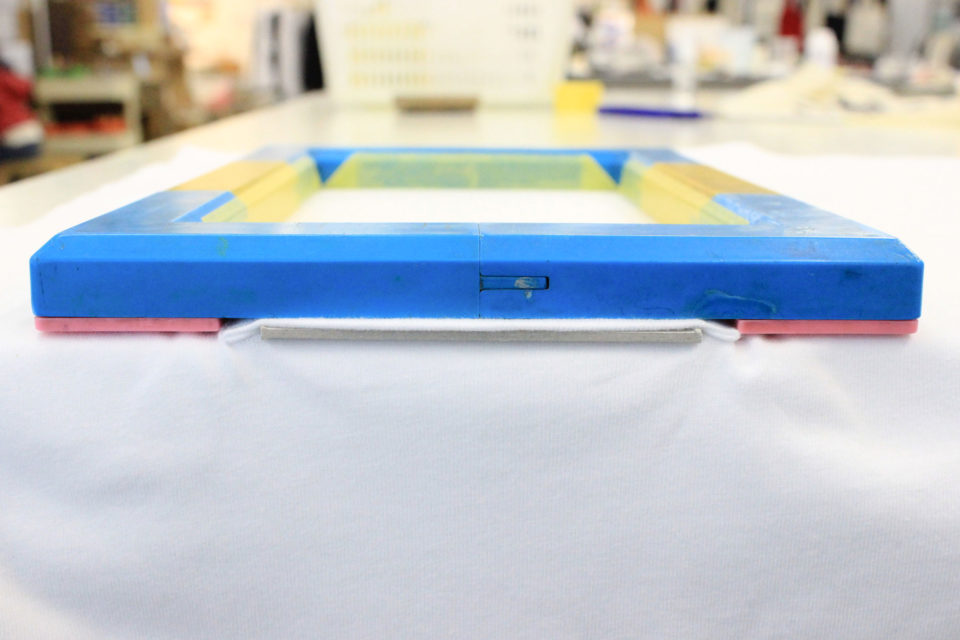
Because the surface of the pocket is raised up, the screen is touching the fabric even with Spacers attached on.
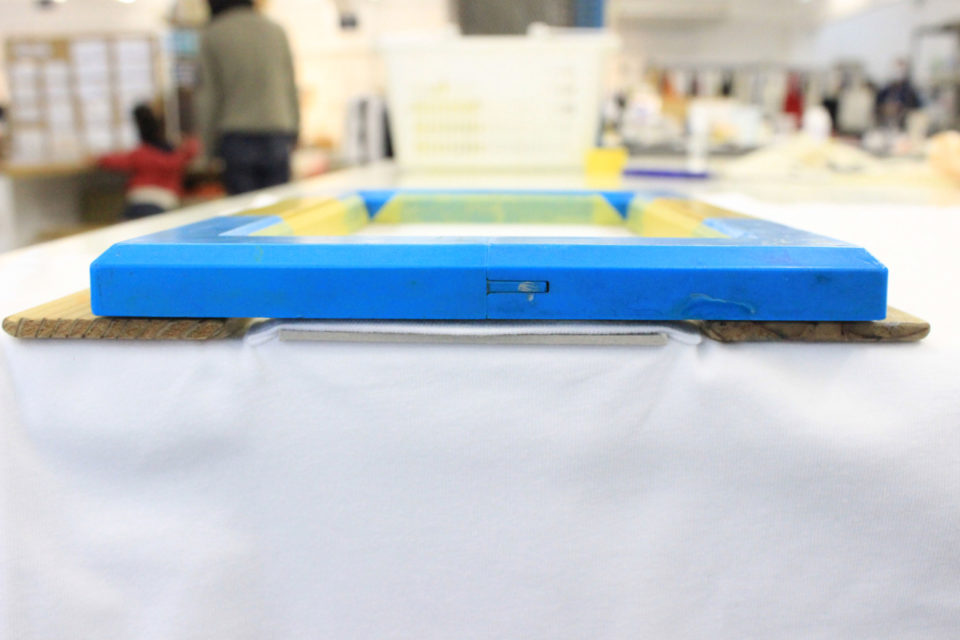
There was too much distance when using both Spacers and boards, so I took off Spacers and was able to make the proper off-contact.
Please note that if there is too much space between the screen and the material, too much ink might get pushed out.
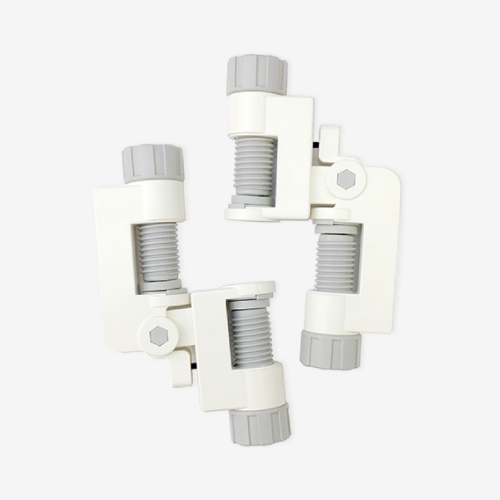
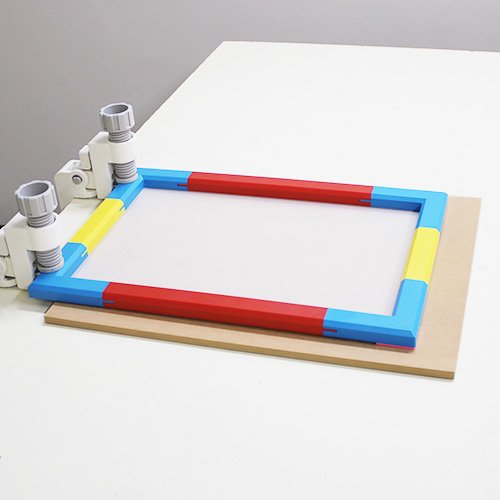
Using SURIMACCA Holder
To make your printing easier when you are working by yourself, we have “SURIMACCA Holder” to mount a SURIMACCA frame to a table.
The lower part of the holder is attached to the desk like a vise, and the upper part is fixed to the frame.
The upper part of the holder can be raised and lowered.
When using a Holder, there will be a gap between the table and the frame, and you can use a board to adjust the height to solve this.
The same tips can be used when you are using the Holder. For those materials with some thickness or with different leveled surfaces, you can put boards underneath the Spacers.
Summary
For whatever the case is, whatever the material is, utilizing cardstock paper and boards to create the proper “space” is a key to successful screen printing!
Be prepared and have fun printing with SURIMACCA!
Products used in this blog
* Only domestic shipping is available at our online store.

Spacers
¥693 (tax included)
商品を見る
Lunch Bag Panel
495 (tax included)
商品を見る
Chipboard (A3)
\ 143 (tax included)
商品を見る
SURIMACCA Holder
\ 14,300 (tax included)
商品を見る
Holder Panel
\ 550 (tex included)
商品を見る
SURIMACCAは、シルクスクリーンの製版サービスやオリジナルキットの開発のほか、シルクスクリーンの作業場を全国に拡げるプロジェクトを行っています。『JAMLAB』ではリソグラフやシルクスクリーンを使った実験や遊び方を紹介しています。
- SURIMACCA
- https://surimacca.com/
- 06-6485-7350(10:00~19:00)